- Introduction
- Getting Started
- MiniPC and USB Hub
- KVM Requirements
- Power and WiFi/Internet
- Windows10 Setup
- Astro-Hardware Downloads
- Astro-Software Downloads
- Information Collection
- Installation Part 1: The Foundation (Daytime/Indoor Possible)
- Installation Part 2: Primary Components (Outdoors at Night)
- Installation Part 3: Guiding (Outdoors at Night)
- Additional Steps and Follow-on Efforts
- Open the YouTube Video for this Build
There comes a time in most amateur astronomer’s lives when we come to a realization that we are ________________.
(insert one or more of the following: Tired / Cold / Hot / Bug-Bit / Uncomfortable / Tired of hearing our family say “Are you coming in?”)
At that moment, we think to ourselves, there must be another way… but what? Well, I’ll let you in on a little secret, it involves configuring a small computer that will become the most important part of your entire telescope rig. But this sounds like I need to spend more money and I was saving up for a new monochrome camera? Trust me, do this first, and get the camera later. You, and your family, will thank me.
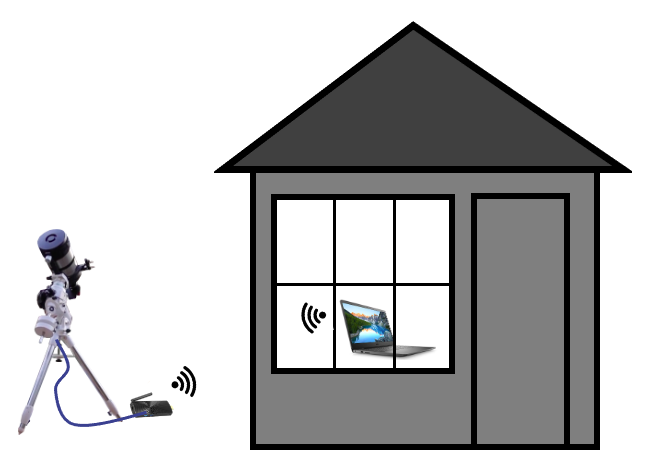
Let’s talk about the overall goal for a second. What we want to eventually accomplish here is that we can put together a low cost, and potentially low power, mini computer that we can mount on or near our telescope which will run all aspects of our night time, or day time, imaging sessions. This computer will connect to your equipment via USB and ideally be able to be powered via your local AC power source or even your DC battery when in the field. While we could place a small (touch-) screen with this computer and/or maybe a mouse and keyboard, our goal will be to keep this completely headless and instead control and view this computer remotely. “But wait, you mean I could be in my house, or tent, or car?” Yes, that is exactly what I mean!
Interested? Great, let’s get started! What do I need to purchase? That depends a little upon what you are already using to control your telescope. If you already have some level of automation in place and are using programs like PHD2 and N.I.N.A., then you should already have some of the pieces we will talk about, otherwise to get started, you will need:
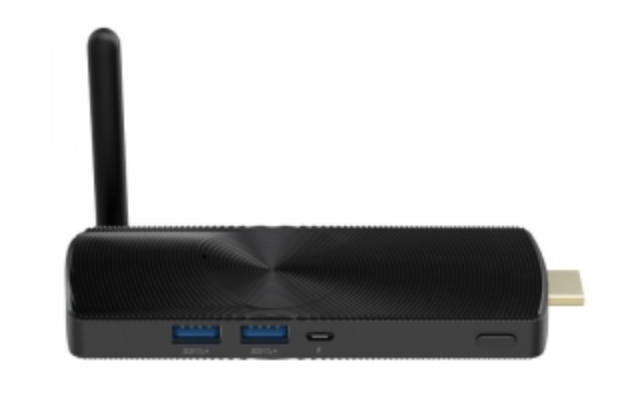
- Mini PC or Stick PC and possibly a USB3 Hub (Depending on available ports)
- Screen / Keyboard / Mouse (at least temporarily)
- Wireless AP/Internet (Home AP that reaches your telescope [We will mention an alternative option later on for when you are in the field])
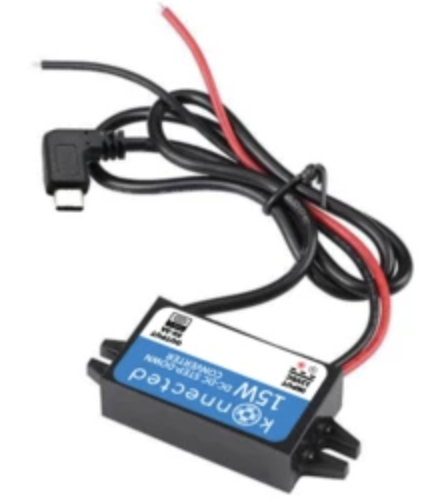
- Power (110/220v AC when at home but 12v capable when in the field)
Quick Disclaimer: Any links on this page to Amazon or OptCorp are affiliate links. I may be compensated at no cost to you should you use these links – although it may result in me buying more new equipment and writing more articles. 🙂
Let’s have a brief discussion about the MiniPC and USB3 Hub. When selecting a mini PC there are a few considerations:
- Processor (2/4-core [at least 4-thread capable] and preferably not Celeron N or Atom)
- Memory (minimum 4GB but 8GB would be a bonus)
- Disk (64GB SSD would be perfect, but more is better, and adding MicroSD/USB will work)
- USB Ports (at least 2x USB3 ports, but we can add a USB hub if we need more ports, or you may find that your camera has built-in USB ports as well)
- Networking (I prefer it to have both WiFi and Ethernet)
- Power (While it will come with a 110/220v AC brick, making sure the device itself is 12v DC is ideal, although 5v is easily adaptable. Other voltages can work but with a bit more effort)
- Size (As light and as small as possible is best)
- OS (Win10 Pro is recommended for RDP capabilities)
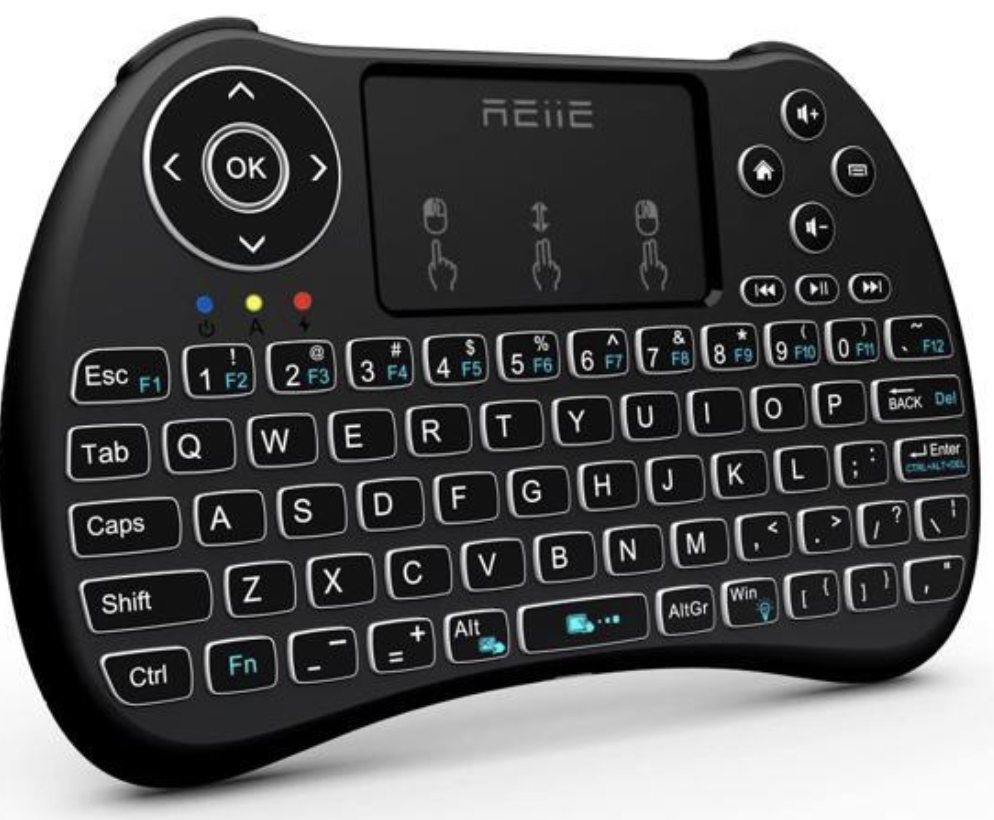
A directly connected Keyboard, Video screen, and Mouse (KVM) will be a requirement when initially configuring the MiniPC but you will rarely ever use them after that point. It should be noted that the worst case scenario would be that you have an issue while in the field and desperately need these components, so I would recommend if you can afford the luxury, to purchase a screen and keyboard/mouse that is small enough to keep around without being in the way. You may prefer a full-size wireless keyboard and mouse along with a desktop display during initial setup but the raspberry pi style/size components are great for travel.

Power and Wireless Internet will almost definitely vary based on your location. When at home, you can use the MiniPC power brick to connect to your available AC power and also use your home Wireless solution assuming it reaches out to your telescope. When in the field, you may need to adapt your solution to run off a 12v battery. If you purchase a 12v MiniPC, you can easily adapt the wiring for this (See my video here). If it is not 12v native (do yourself a favor and get one that is 12v), you can adapt the voltage by using a buck converter (I use one here in this video). If converting voltage is required, make sure you use a buck convertor that provides the correct input and output cabling/interfaces as well as ensuring it supports your input and output voltages. As far as wireless access when in the field, we are going to table that discussion until a bit later as it adds come complexity that we don’t need to introduce just yet.
OK, at this point I will assume you have your new MiniPC powered up and have Keyboard/Video/Mouse (KVM) access. Let’s go through the high-level steps to get your MiniPC fundamental configuration in place.
- Run through the Win10 initial setup which should include setting up a new User/Password.
- Connect the system to your WiFi/Internet.
- Set your date and time to properly reflect your timezone and daylight-savings time.
- Verify the version of Windows 10 (Win10 Pro would be ideal).
- Change the Computer Name to something recognizable. This will eventually require a reboot.
- I would set the IP Address to use a Reserved DHCP address in my home AP/router if you can do that. It will ensure you always get the same address which will make your life easier over time. An alternative to this would be to set a Static IP Address on the adapter in windows.
- Now it is time to start patching/updating your windows system. This will take several reboots and Windows Updates to complete (most likely).
- Set your Windows Active Hours such that patching and any associated reboots do not occur overnight while you are imaging.
- Remove any Bloat-ware/Crap-ware that came pre-installed with your minPC that you don’t want or need. (Add/Remove Programs typically)
- At this point, I go into Add Windows Features and add .Net 3.5 since I have seen it still required by a few astro-imaging packages. (It will just make things simpler later on.)
- Cleanup any desktop and start bar icons you want to remove.
- Install Security/AV software, update it, and scan the system. Especially for pre-installed Win10 OS systems. You never know…
- Setup Windows Power Management. You do not want the system or screen to sleep, hard drives or wifi/USB to sleep/powersave.
- Install any additional base applications you may need/desire such as Google Chrome (I like it for mirroring occasionally to a TV or projector via Chromecast) and Adobe PDF Reader.
- Enable, Configure, and Test RDP Access to this MiniPC.
It is now time to download any Astro-related Hardware Support Software and Drivers. Here is a list of items I download. Your list may vary depending on your own personal components. I Always start with the ASCOM Platform Software before I start retrieving all other component software packages. It is important that you remember to download all software pieces for each device. This may include a Software Suite/Desktop Application, Windows Drivers/SDK, as well as a separate ASCOM Driver.
- ASCOM Platform 6.5SP1
- Mount Control (For my EQ6-R PRO, I use the most recent EQASCOM from the EQMOD Project)
- Focuser Control (My Pegasus Astro FocusCube2 has a Desktop Application, USB/Windows Drivers, and a ASCOM Driver)
- Filterwheel Control (My QHYCCD CFW3 uses the QHY All-in-One System Pack that has everything including ASCOM)
- Polar Scope Control (My QHY PoleMaster has a System Driver and Windows Software as well)
- Camera Support for Primary imaging and Guiding (I use ZWO cameras for both so I download the ASI Native Drivers and ASCOM Drivers as well)
Continuing our download process, we will now retrieve the various Astro-Software packages we intend to use. Your requirements may vary, but here is what I will download for now:
- PHD2 (I will specifically download the Dev5 version that includes multi-star guiding support. The stable release is here if preferred.)
- N.I.N.A. and the SkyAtlas Database (I will download the 1.10HF2 x64 stable version since I want to use synchronized dithering which is not yet supported in the nightly builds. The Sky Altas download is at the bottom of the same download page.)
- SharpCap Pro (I use this for planetary and Solar imaging.)
- ASTAP and the ASTAP Database (This is for platesolving within N.I.N.A. Download the ASTAP Installer and either the H17 or H18 Database from the same download page. I use the H18 with my 8 inch SCT.)
- Stellarium (optional, but nice to have)
Before we start installing any of the software, we should do some preliminary data gathering which will simplify our installation and configuration process. Collect the following information (much of this info is available via manufacturer websites):
- Guide Scope: Focal Length (mm)
- Guide Camera: Pixel Size
- Telescope OTA: Configured Focal Length (mm) and Focal Ratio
- Imaging Camera: Pixel Size, Desired Gain Value(Unity?), Offset Value
- Filter Wheel: Filter Positions within the Wheel
- Location Coordinates: Both Decimal (DD) and Non-Decimal (DMS) Latitude and Longitude along with Height above Sea Level.
Installation Part 1: The Foundation (Daytime/Indoor Possible)
Finally! Time to install some of the software! Here is the process I follow based on my own hardware.
This first part of the installation can potentially be done during the daytime and even indoors if desired. The telescope hardware will need to be accessible and ready for connections. You can choose to remain directly connected to the MiniPC or use RDP while completing the following:
- Install ASCOM Platform
- Install EQMOD/EQASCOM
- Install SharpCap Pro (I install this now because occasionally there may be SDK components from your other devices that need SharpCap pre-installed)
- Install ASTAP and the associated Star Database.
- Install N.I.N.A. then the associated SkyAtlas.
- Now we can Install Additional Hardware Components
- Polar Scope Driver and Software
- Focuser Drivers and Software
- Filter wheel Drivers and Software
- Camera Drivers and Software
- Configure EQMOD for the Mount (Required for my mount, your Mount config may vary)
- Connect to the Mount via USB using a supported EQMOD Cable
- You may need to check Windows Device Manager to see what COM port is assigned.
- Launch EQASCOM Toolbox and Configure the connection
- Validate controls and Park functionality.
- Start N.I.N.A and Setup your Profile via the Options Menu.
- This includes setting various location information, telescope parameters, assigning ASTAP for platesolving, etc. Step through each Options configuration tab/screen as necessary.
- Physically connect your hardware via USB (You may need to attach a USB hub if you require additional ports)
- Connect to each component within N.I.N.A and complete any configuration that may be required such as setting the default gain, offset, and the cooling capabilities of your imaging camera.
Installation Part 2: Primary Components (Outdoors at Night)
This next part of the installation should be done outdoors at night with a clear enough sky to allow you to see objects/stars. I will assume you have performed a rough alignment of the mount and still have KVM and WiFi/internet access (either directly or via RDP). Additionally, if you already have configuration settings info from a computer that was previously connected to this hardware, retrieve that configuration settings info (or profile file) to simplify the configuration process outlined below. Once ready, perform the following steps:
- Complete your Polar Alignment process (I use my PoleMaster scope and associated software to accomplish this task.)
- Start N.I.N.A and select your Profile.
- Ensure you hardware is all cabled via USB and powered on.
- We can now test and validate our hardware within N.I.N.A.
- Go to the SkyAtlas and select an object that is currently visible from your location and is near the Celestial Equator which is located at DEC 0. Also, ideally make sure it is fairly close to the meridian, although just after the meridian is best in order to avoid an unnecessary Meridian Flip. Anything between -20 DEC and +20 DEC should be OK and will help us later when we perform PHD2 calibration for the first time.
- Set this object for Framing
- On the Framing tab, Slew to the Target. (This tests our mount control and Framing capability)
- Go to the Imaging Tab and take a single image by setting a filter, exposure length, etc. (This allows us to test our filter wheel and primary imaging camera). You can choose to loop this image if desired so that you can more easily achieve rough focus during the next step.
- Use N.I.N.A. focusing controls to achieve rough focus (This tests our focuser connection). Once rough focus is achieved, note the focuser position (#)
- With a rough focus in place, run a N.I.N.A. Auto-Focus routine. Fine-tune your auto-focus configuration settings until this seems to work consistently.
- Now that you have focus, run a Platesolve to test the ASTAP configuration. ASTAP should be allowed sync coordinates to the mount and slew as necessary to center the previously selected SkyAtlas target.
Installation Part 3: Guiding (Outdoors at Night)
We now have N.I.N.A. working and ready to start imaging the night sky! Before proceeding however, we need to configure guiding so we can ensure long exposures track well throughout the entire evening.
- Connect your Guide Camera to a USB port
- Install PHD2 and launch it when the install completes
- PHD2 should auto-detect your Guide Camera
- Allow PHD2 to connect to your Mount and Guide Camera
- Set the parameters for your Guide Scope and Camera if they are not auto-detected. (Make sure it detects the Guide Camera and not your Primary Imaging Camera. Change it if necessary.)
- If prompted, cover your guide camera and create a Dark Library for this camera.
- Click the icon in PHD2 to start Looping images. If necessary, adjust your brightness and exposure length. Additionally, if this is a new setup, you may need to adjust your guide scope & camera focus at this time.
- Ensure you are still near the Celestial Equator. (You should be unless you are doing this over multiple days.)
- Now, click the Start Guiding icon and a Calibration process should begin. (Calibration should ideally be completed near the Celestial Equator [DEC 0] and within an hour of the Meridian so our previously selected target should work perfectly for this.)
- Once the calibration completes, let guiding settle for a minute or so, then return to N.I.N.A and connect the PHD2 device.
Additional Steps and Follow-on Efforts
Well, there you go! You are now capable of imaging while guiding throughout the evening. Here are a few follow-on things you may want to complete to tidy up any loose ends:
- Affix the new MiniPC to your mount (Don’t forget to re-balance the mount when finished.)
- You can use velcro, cable ties, or any other solution for this.
- Be careful to minimize the opportunity for cable snags and be certain that your mount can slew freely to all necessary pointing positions while still allowing all usb and power cables to reach the devices.
- Test some basic imaging sequences within N.I.N.A including something with a required Meridian Flip.
- Consider setting mount limits if necessary to limit the potential for your telescope and attached components to collide with your tripod.
- Install and configure Stellarium and any other software you would like to use on this PC.
- Clean up your power cabling and allow for easy use in the field via a 12v DC battery. (Cable Video | Battery Video)
- Configure a miniAP to allow you to access this new system while away from your home WiFi/Internet. (Instructions | Video)